How To Make A Pwnagotchi In 2022 With A Waveshare V3 Screen

As a techie we all know what that means, the itch to tinker with some type of tech happens often. Being in cybersecurity I wanted to go back to my roots. Wifi auditing. Let’s create a pwnagotchi.
First the goal of this post is to have every question answered that I had the past few days when building my Pwnagotchi. There were two main issues I had when trying to complete my build. How to get WaveShare v3 screen to work on Pwnagotchi? How to get internet to work on the Pwnagotchi?
Tutorial On How To Build A Pwnagotchi With Waveshare v3 Screen In 2022:
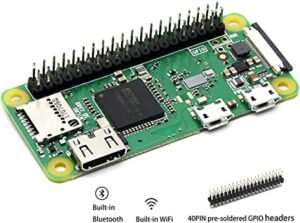
Raspberry Pi Zero WH With Pre-Soldered GPIO Pins
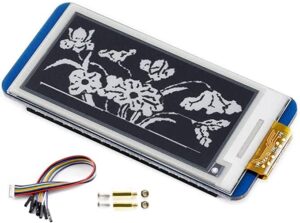
2.13inch E-ink Display HAT v3
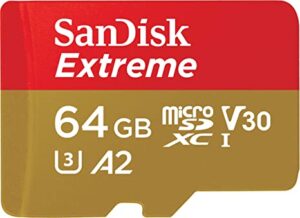
SanDisk 64GB Extreme MicroSDXC Card
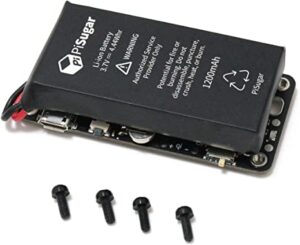
PiSugar2 Portable 1200 mAh UPS lithium battery
Above you will find all products I ordered through Amazon to create the Pwnagotchi. Take note that using different versions of the things mentioned may cause issues during the creation of the little gadget. Different products may work but I can’t guarantee it.
How to install the PiSugar2 Backup Battery To Raspberry Pi Zero W
When I first got the PiSugar2 there were little to no instructions. The PiSugar2 will come in a box with some screws and one piece of paper giving a rough idea of how to attach it to the Pi Zero. I know what you’re thinking. Yes I did search YouTube but none had exact instructions on the basics. While the installation is very easy, I like to read documentation before I put electronics together. Especially working with lithium batteries.

- The screws holes you see on the PiSugar2 will have a plastic film over them. You will have to punch through the film first before using the cheap plastic screws it comes with. Imagine breaking a seal. The reason you need to break the seal is because the PiSugar2 comes with plastic screws you will be using to attach it to the Pi. They had trouble punching through when I tried to just screw through seals.
- The pins you see that are gold plated are where you need to precisely sit the GPIO pins from the Pi when installing. Don’t worry about putting pressure on the pins when you sandwich the Pi and the PiSugar battery together. The pins have a spring type action and move accordingly to accommodate the pressure.

- Place the PiSugar2 upside down and align the GPIO pins. This means you will have the Raspberry Pi’s back to the PiSugar2 battery.
- In figure 2 you should see how to align the Pi W’s pins with the PiSugar2 gold plated pins. The back of the Raspberry Pi’s GPIO pins should sit inside of the PiSugar2’s springy receiver pins. Once you confirm alignment you can start to screw the plastic screws in from top to bottom carefully. You will screw from the top of the Raspberry Pi down into the PiSugar2 screw holes.
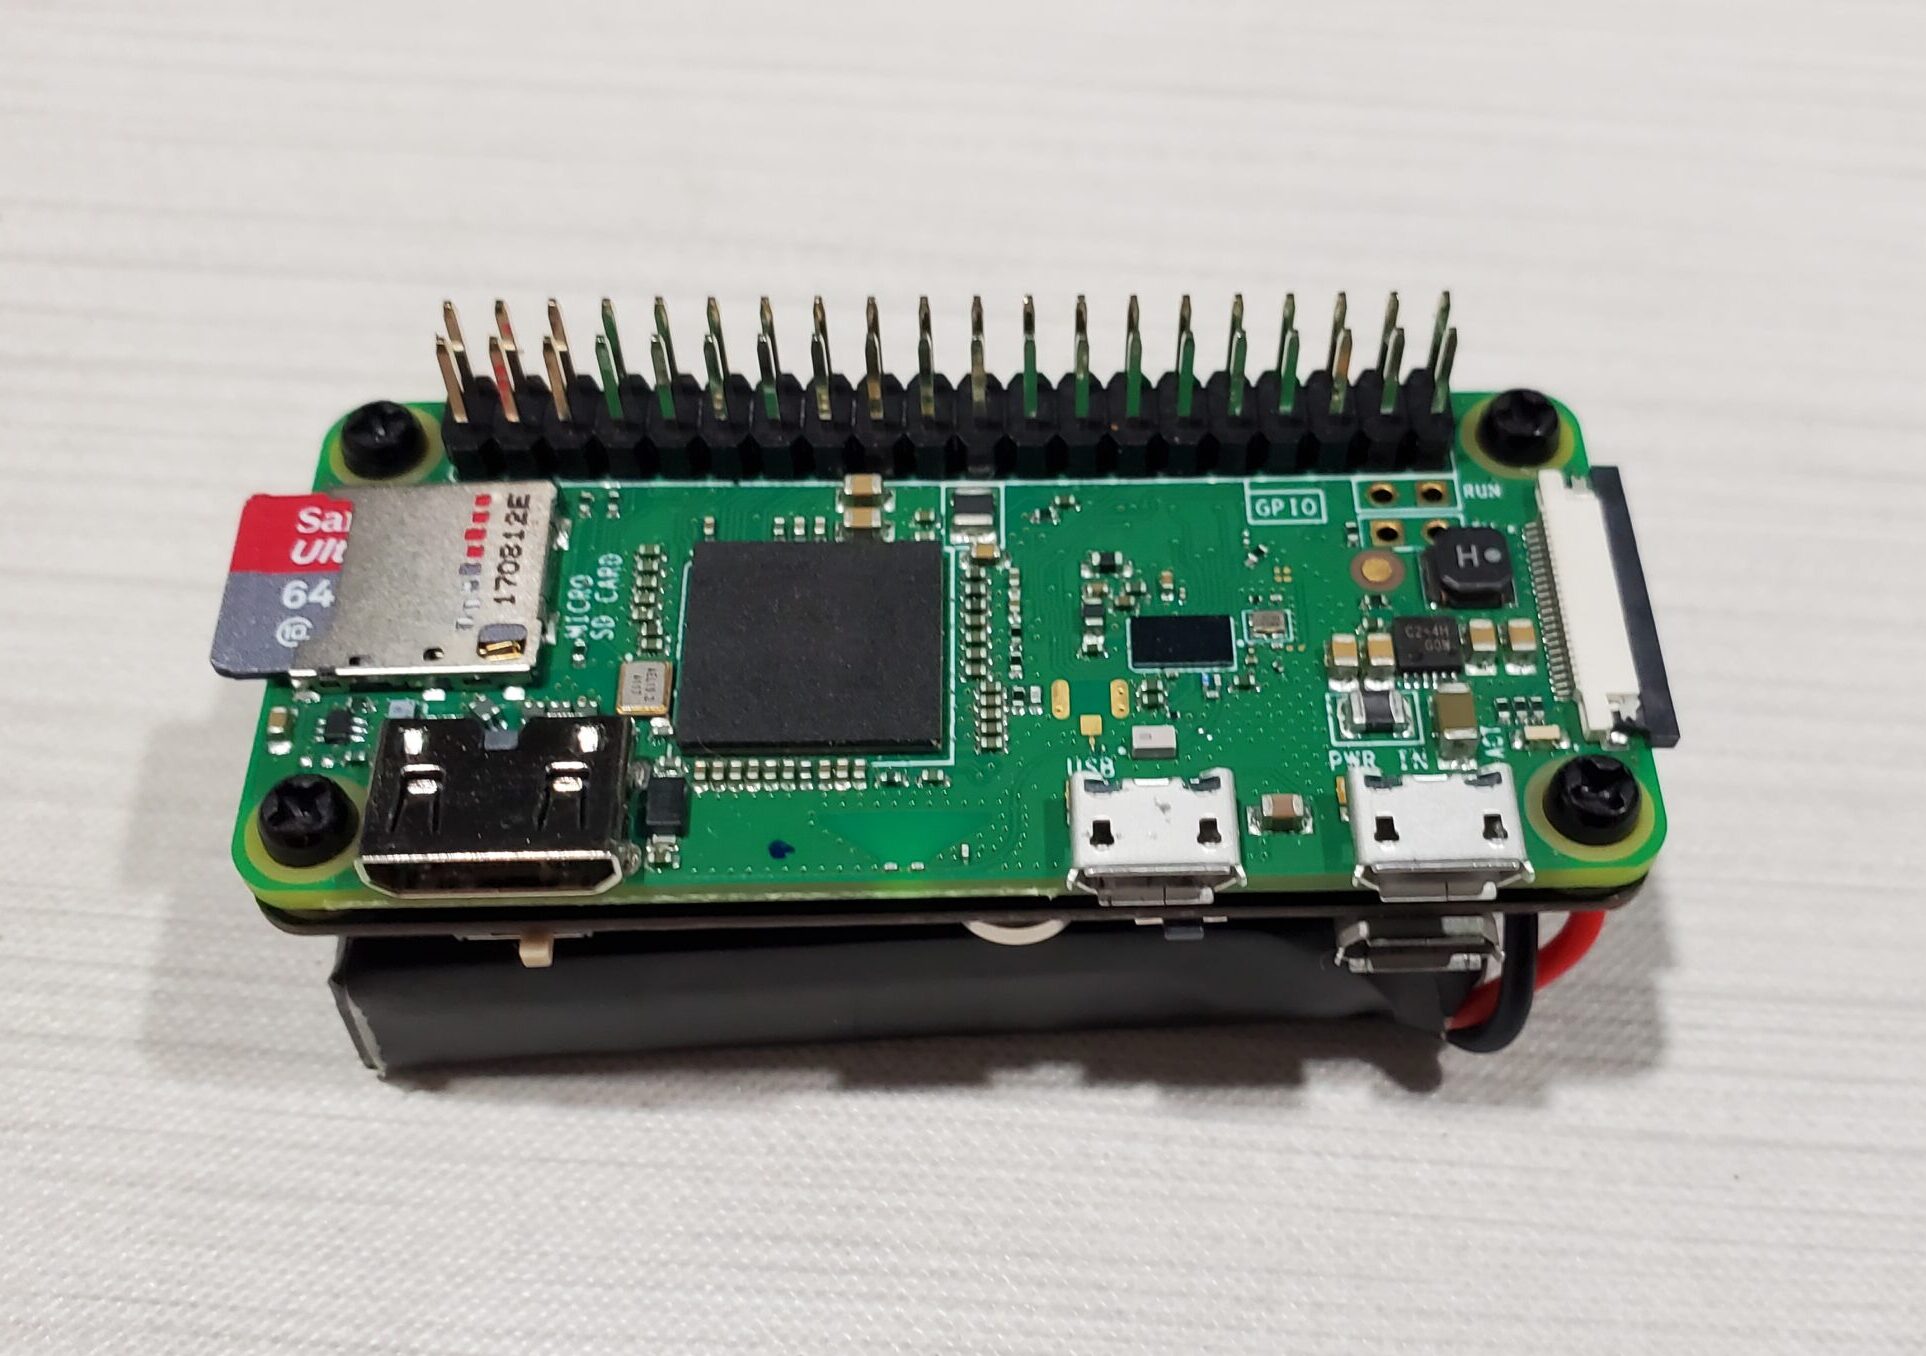
If done correctly you should have a device that looks like the image above. Make sure you tighten the plastic screws enough to hold the two devices together but also not tight enough to where you strip the plastic screws. I know it doesn’t make sense but you get what I’m saying. Also don’t forget to put the washers on the other side of the screws to keep them from coming loose. I didn’t install the washers as I don’t plan on banging this thing around enough where the screws come loose.

Now we have to install the Waveshare V3 screen. This is as simple as lining up the screens sockets with the GPIO pins on the Raspberry Pi and pressing down firmly and evenly. You should end up with an end result looking like image 2. Success, the hardware is all put together.
How To Prepare SD Card for Pwnagotchi To Work With Waveshare V3 Screen
We’re done with the hardware part. Let’s start with the software part which is just as simple. The general idea is you must now flash your Micro SD card with the Pwnagotchi’s OS but there is one key issue that people run into. The original Pwnagotchi firmware does not support the Waveshare V3 screen display. We will be using a Pwnagotchi firmware that has new custom made drivers that include support for Waveshare V3 screens.
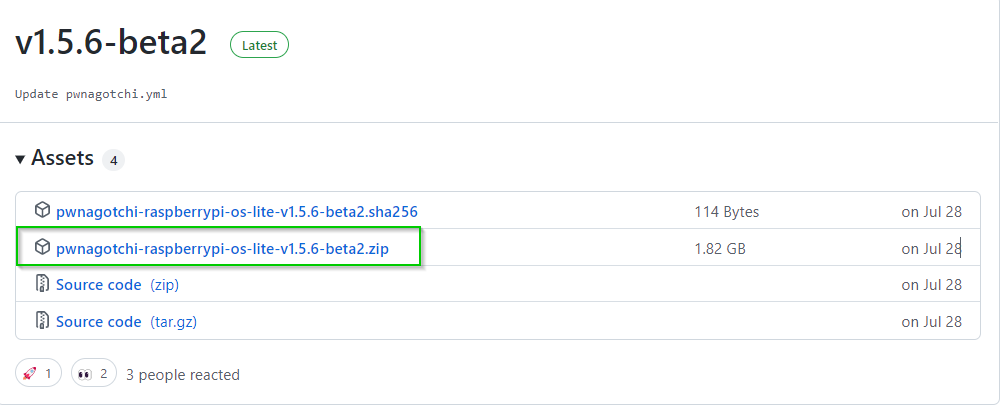
- Pwnagotchi Firmware 1.5.6-Beta2 – https://github.com/DrSchottky/pwnagotchi/releases
On the release page you should see the zip file download. Confirm the hash is the same after the download to move forward to the next step. Alternatively you don’t have to check the hashes but this goes back to cybersecurity skills. You should know how to check the hashes of downloads to confirm you have not downloaded a compromised file.
Now you must flash the downloaded zip file onto the MicroSD card. The SD card will act as your Pwnagotchi’s hard drive that holds it’s memory and operating system. In order to flash the file we will be using a program on Windows called balenaEtcher.
- Download balenaEtcher for your operating system here – https://www.balena.io/etcher/
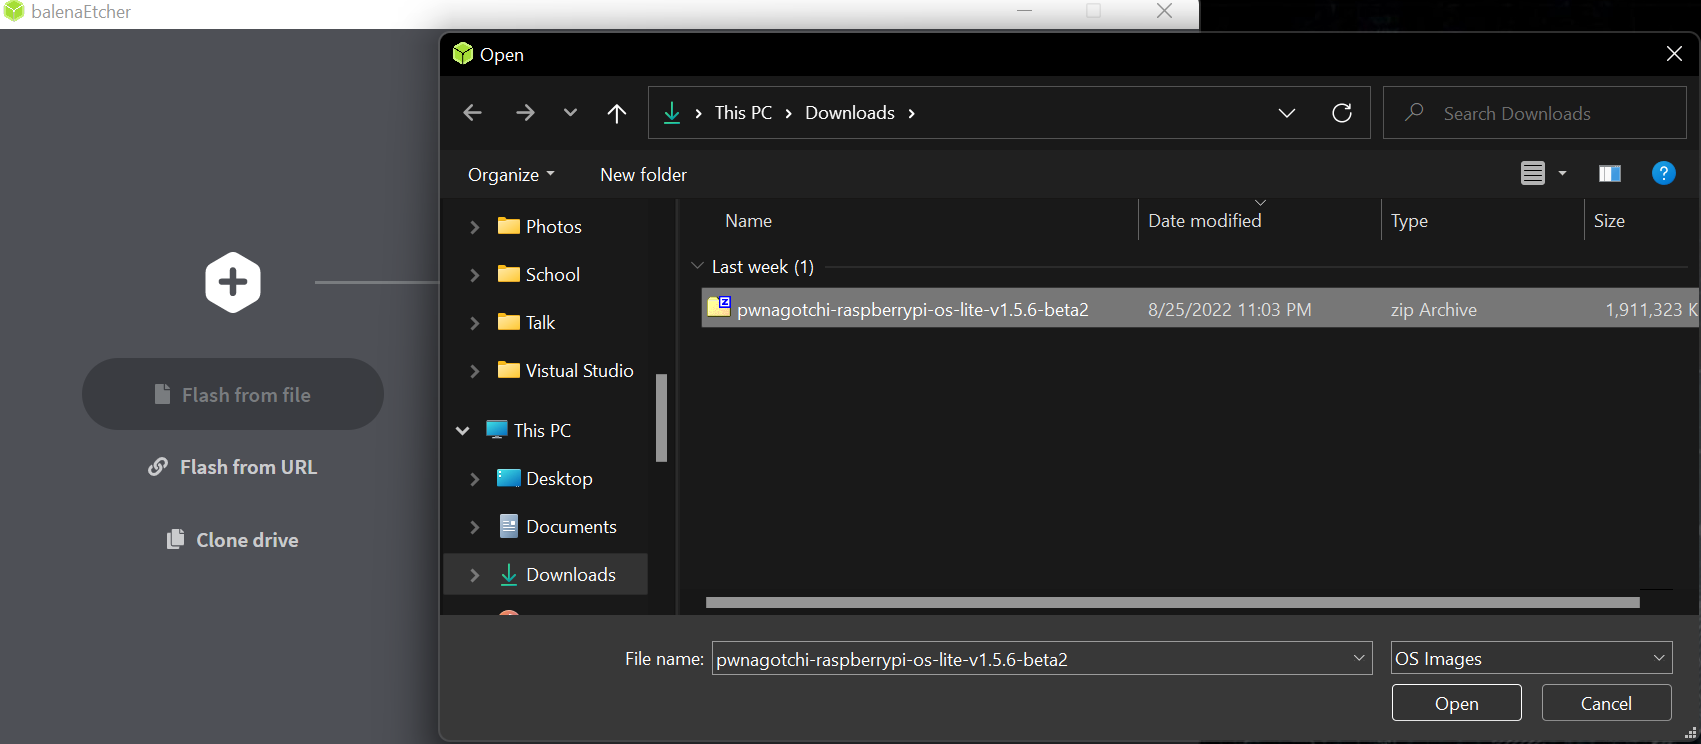
- Open balenaEtcher and click on flash from file
- Choose the zip file you downloaded with the Pwnagotchi 1.5.6 beta firmware. No you don’t have to unpack the zip file.
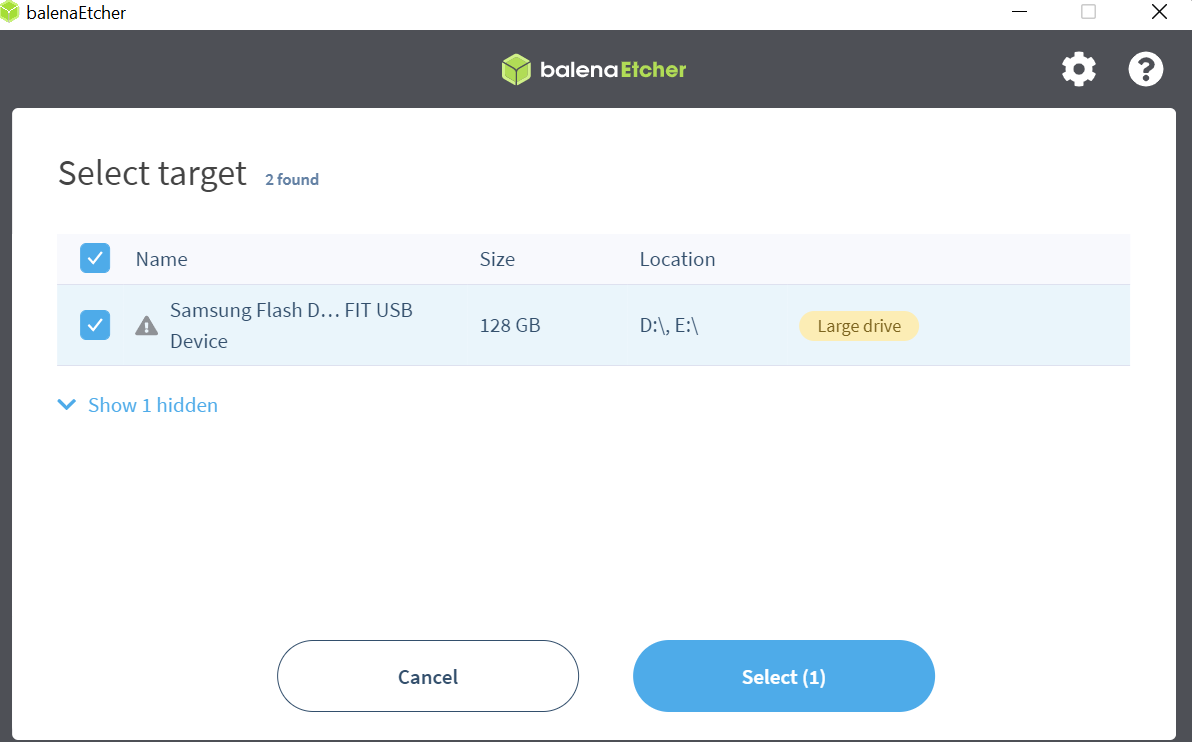
Make sure to choose the correct memory device. In the example shown above I had a USB thumb drive inserted. In any case you should see the SD memory card showing with the 64 GB of memory shown under the size area. Select the memory card and continue to flash the firmware. Be patient. Flashing the Raspberry firmware to the SD card should take a little under 5 minutes on a decent computer and around 10 minutes if you have a dinosaur pc.
Once the flashing is done you should hear Etcher notify or the windows unmount sound. DO NOT PUT THE SD CARD INTO THE PI JUST YET. You still need to create a configuration file on your pc to then transfer it over to the root of your newly flashed SD card.
Take out your newly flashed SD card and plug it back into your computer. Open the root of the memory card. You will see lot’s of files that pertain to the Raspberry firmware you flashed. We must now create a configuration .toml file on windows Notepad.
I will be sharing the configuration file I started with. Remember that when copying and pasting the information below. You will should change certain things to match to your liking.
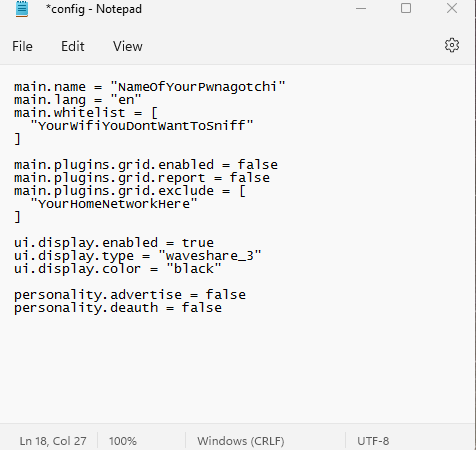
Copy and paste everything in between the lines:
____________________________________________
main.name = “NameOfYourPwnagotchi”
main.lang = “en”
main.whitelist = [
“YourWifiYouDontWantToSniff”
]
main.plugins.grid.enabled = false
main.plugins.grid.report = false
main.plugins.grid.exclude = [
“YourHomeNetworkHere”
]
ui.display.enabled = true
ui.display.type = “waveshare_3”
ui.display.color = “black”
personality.advertise = false
personality.deauth = false
____________________________________________
Descriptions of the files you should change.
- Main.Name – In the quotes you should give your Pwnagotchi a name. This name will also give your Pwnagotchi it’s hostname so that when you type in yourcustomname.local on your web browser, you will see it’s web ui aka it’s web page.
- Main.Whitelist – In the quotes “YourWifi” should be changed to the name of your wifi at home if you want to whitelist it. This means the pwnagotchi won’t capture it’s handshakes and will ignore it.
- Main.plugins grid/reports – I changed mine to false as I don’t plan on sharing my pwnagotchi information online.
- Leave the display settings as they are do not change them.
- Personality.advertise = false – this is a setting there your pwnagotchi sends out association frames to help gather handshakes. You can change this to true if you want to the full affect of capturing your own personal wifi handshakes at home, for testing purposes
- Personality.deauth = false – I disabled deauthentication on my pwnagotchi as to not boot any wifi devices around me from their networks. You may change yours to true but have deauth on only where you have permission to audit the wifi networks around you.
Note that disabling personality advertise and deauth will essentially make your Pwnagotchi just a cute harmless little guy. It will see SSID broadcasts around it and save those to it’s logs. If you want to capture your homes handshakes efficiently you should set the personality settings to true and take your wifi network name off the whitelist.

Once you have your settings set up the way you want it’s time to save the configuration file. Using the “save as” option in Notepad you should click on all files and name your file config.toml (the image above is missing the .toml extenstion). You can now copy that file to the roof of your SD card.
Success the moment of truth is here. Make sure your PiSugar2 battery is charged, it’s best to plug it in to charge until it shows a green light confirming the battery is full. Put the micro sd card into the Raspberry Pi and turn on the power switch on the PiSugar battery board, it should be a tiny little plastic lever switch. You should see a blue light turn on which means your PiSugar2 is on and providing power. You should also see a green light flickering on the Pi confirming that it’s reading files from the SD card.
LEAVE YOUR PI ALONE AND LET IT FULLY BOOT, YOU MAY NOT SEE THE GREEN ACTIVITY LIGHT FLICKERING. GIVE IT 10 MINUTES TO BOOT.
Waiting 10 minutes may be overkill but you do not want to power off your device when it is installing itself and generating ssh keys. Doing so may damage the install and you will have to reformat the sd card and remake your config file.
Look at your happy little guy!
How To Connect To Your Pwnagotchi Via USB Using SSH?
So how do you edit your pwnagotchi configuration file? How do you get data off of it? SSH is how. You will need to install drivers needed so that your Pwnagotchi’s usb connection can be used as an lan ethernet connection to your windows pc.
- Download the drivers from here – https://web.archive.org/web/20200801154151/http://web1.moddevices.com/shared/mod-duo-rndis.zip
Once you install the drivers you will now need to connect your Pwnagotchi to your computer via the USB data port. The data port is the micro usb port that is on the inside of the Raspberry Pi board. It’s also the one that is touching the Waveshare v3 screen’s cream colored port.
Once you confirm the drivers are installed you must now check the lan adapters on your PC. You should see something along the lines of You will now need to use an ssh program to get into the pwnagotchi via command line and tinker away. I like to use Solar Putty which is putty but the SolarWinds modified version with some simple features I enjoy.